Old Things New

TRANSFORMED, from broken to beautiful

Navigation
  • Home
  • Painted Furniture & Misc.
  • Tutorials
  • Abortion Story
  • Freedom Friday Posts
  • Funny Stuff
  • My (Our) Story
  • Freedom Session Website
  • Contact

French Pillows & Ruffled Slipcovers - Part 1

August 22, 2016 by Patti 19 Comments

On Saturday morning Mr. OTN and I sat on the back porch drinking coffee and planning our day. It wasn’t long before our talk turned to more serious life matters and, as the discussion became hard Mr. OTN said,

“Let’s get in the car and go exploring. Let’s go somewhere we’ve never been.”

My first reaction was to remind him of all of the things we needed to take care of at home, unfinished projects, finances, yard work, etc., . . . and the more I talked about all that we needed to do the more I too, wanted to escape.

So we did. With a promise that Monday would be an all day work fest here at home!

We drove up to Talulah Falls in the Georgia mountains where we hiked a little and enjoyed some spectacular scenery.

Then we drove down into Lakemont, Georgia and came across a small artist’s village where we had lunch on the front porch of Annie’s at Attic Annie’s.

As much as I love being at home, sometimes getting out of my own environment is what I need to hit my refresh button.

My senses were filled right here, sitting on the front porch of the diner. And the overwhelming sense of contentment I caught in this place stayed with me the rest of the weekend.

Summer breezes blowing round me, watching people come and go, a Reuban’s delicious aroma, the sweet-tart tingle of lime Perrier on my tongue, the sound of mountain birds behind the chatter of other diners. Being together here, was a beautiful place to be.

Now it’s Monday and I’m ready to seize the day, beginning by sharing this tutorial and some photos of our very own favorite place to share a cup of coffee.

Earlier this summer I wrote a post on how I gave a French Courtyard Feeling to my backyard deck. We have thoroughly enjoyed this space this summer and when I look at these earlier pictures I can really see how much our plants have grown!

I do believe our flowers like it here in South Carolina.

Patio Courtyard 029

From that post I received requests for tutorials on the French Pillows and Ruffled Slipcovers I made for my patio chairs. So before the summer is over, here is Part 1 where I’ll share with you how to sew an envelope pillow. These are just the EASIEST pillows ever as there is no hand hemming or adding of zippers or other closures.

I HEART envelope pillows!

For both the pillows and the slipcovers I used one of my very favorite fabrics for projects, painter’s drop cloth fabric of course! I washed it first in hot water and dried it on the highest heat setting to be sure there would be no shrinkage after sewing. Let’s get started:

Envelope Pillow Instructions:

Step one: Measure your pillow form and add 1″ for seam allowance.

Step two: Cut your first piece of fabric to that measurement. (my 14″ x 14″ pillow insert needed a 15″ x 15″ piece of fabric). This will be your pillow front.

Step three: Cut a second piece of fabric the same width but add 6″ to the height (for a 14″ x 14″ pillow insert mine was 15″ x 20″).

Step four: Cut your second piece of fabric in half horizontally (this gave me two pieces 15″ wide x 10″ high). These pieces will be the back of your pillow.

Step five: On each of the two back pieces make a 1/4″ fold on the edges that you just cut in half. Press with an iron. Fold this same edge over a second time making a 1″ fold and press again. Stitch hem in place on sewing machine.


Step six: Lay your front piece of fabric face up. Lay your two back pieces of fabric over the front piece face down, matching the raw edges of the fabric. Your hemmed edges will be overlapping. Use straight pins to pin front and backs together.

Step seven: Sew the pinned pieces together in a 1/2″ seam all around the four sides.

Step eight: Make a diagonal cut across each of the four corners of the pillow cover,

. . . turn right side out, and use a pencil eraser or other non-sharp object to push out the corners of the pillow cover.

Insert your pillow form into the back opening and you’re done!

For my French Courtyard look I used French lettering stencils and acrylic craft paint from Michael’s. I also embellished them with rosettes made from strips of drop cloth fabric. You can find a tutorial for making Rosettes right HERE.

That’s the end of Part 1. I’ll be back with Part 2, Ruffled Slipcovers next time.

Don’t forget to PIN me!

Now, tell me. Do you have a favorite way to hit the “refresh” button in your life? What does that look like for you? Is it always something “spiritual” that you find renewal in or can it be something like my Saturday getaway? I’d love to hear your thoughts.

Blessings friends,

I’ve been known to link up to the following great parties!!!

Sunday:

TheDIYShowoff, LifeOnLakeshoreDrive, SilverPenniesSundays, SundaysAtHome,RusticAndRefined, Spiritual Sundays, GiveMeGrace

Monday:

IShouldBeMoppingTheFloor, TheDedicatedHouse, Dwellings, ProjectInspired, InspireMeMonday, BetweenNapsOnThePorch, CelebrateYourStoryMaking Your Home Sing Mondays, The Beauty in His Grip What Joy is Mine/Monday Musings, Darling Downs Diaries,The Art of Homemaking,SmallWonder, LifeGivingLinkup, MomentsOfHope, Glimpses,SittingAmongFriends

Tuesday:

TalkOfTheTown, HomeStoriesAtoZ, AStrollThruLife, CoastalCharm, CozyLittleHouse,CedarHillFarmhouse, KatheWithAnE,TuesdaysAtOurHome, TheWinthropChronicles, Rich Faith Rising Unite Linky, Testimony Tuesday,Cheerleaders of Faith,Tell His Story,IntentionalTuesday

Wednesday:

SavvySouthernStyle, TheBlissfulBee, Posed Perfection, A Wise Woman Builds Her Home,Woman to Woman Word Filled Wednesdays, ChristianBloggerLinkup, Whole Hearted Home, Mom’s Morning Coffee, Women with Intention, Coffee for Your Heart,MessyMarriage, ThreeWordWednesday

Thursday:

ShareYourStyle, ImpartingGrace, EmbracingChange, HaveADailyCupOfMrsOlson,MyRepurposedLife, ADelightsomeLife, KatherinesCorner, PrettyPreppyParty, The Deliberate Mom/Shine Blog Hop, I Choose Joy, Live Free Thursday, Thought Provoking Thursday, PartyAtMyPlace, 100HappyDays, SincerelyPaulas, ThankfulThursdays

Friday:

FrenchCountryCottage, TheCharmOfHome, RootedInThyme, TheDedicatedHouseAnythingBlueFriday, ShabbyliciousFriday, Sweet Inspiration, Faith’nFriends, Missional Women Faith Filled Fridays, Dance With Jesus

Saturday:

FunkyJunkInteriors, OneMoreTimeEvents, SaturdaySparks, TheInspirationGallery, Make My Saturday Sweet

Save

Save

Save

Save

Save

Save

Save

Save

Save

Save

Tweet

Similar interests

  • Betting Sites Not On Gamstop
  • Top UK Casino Sites
  • Betting Sites Not On Gamstop

Filed Under: Home decorating, rosettes, Sewing, Southern Living, Travel Tagged With: Day Tripping, DIY, Drop cloth projects, Envelope Pillows, French Country Style, Ruffled Slipcovers, Sewing, southern living, Tutorial

Shabby Flannel Roses for Valentine’s Day

February 6, 2015 by Patti 15 Comments

Have you ever had a love affair with an article of clothing? Some things are easy to put into the donation bag and some . . . well . . . not so easy.

Sounds silly right? But this little red flannel shirt and I go back a long way. She’s experienced a lot of life with me. Once crisp and new, she is now aged to the perfect degree of softness. Once stylin’ with a pair of crisp black jeans she now looks better paired with faded ol’ blue jeans. Once a perfect fit, she is now snug across the back and the front. No, it isn’t too many trips to Cracker Barrel (though this new place we’ve found to eat since moving south worries my youngest daughter greatly), it is this strange shape-shifting thing that is going on now that I’m about to turn . . . EEK . . . 60!!! But even with my renewed commitment to fitness (Water Zumba - so much FUN) this shirt is past it’s prime . . . one sleeve is covered in paint, the color frayed, and fabric wearing thin.

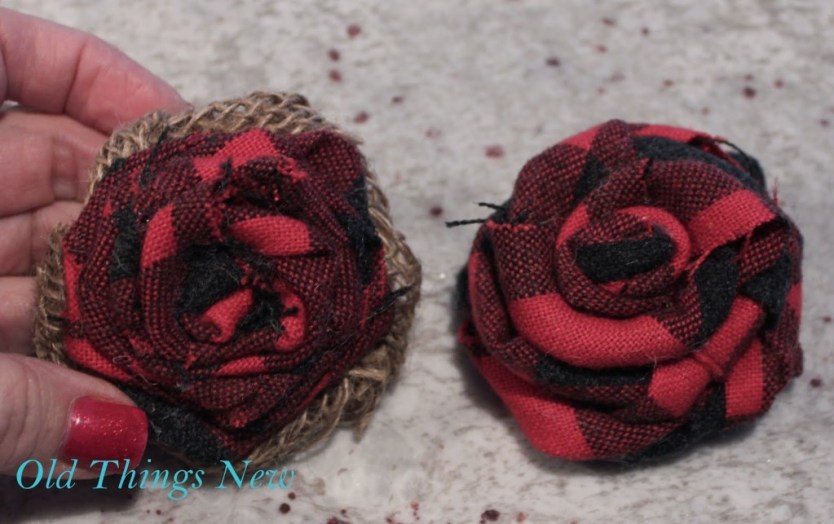
So rather than toss my beloved shirt, I decided to make some flannel rosettes, especially since it is red and Valentine’s Day is right around the corner. With a few strips cut and rolled, and a little bit of hot glue, it was a quick and easy project accomplished in just over an hour.

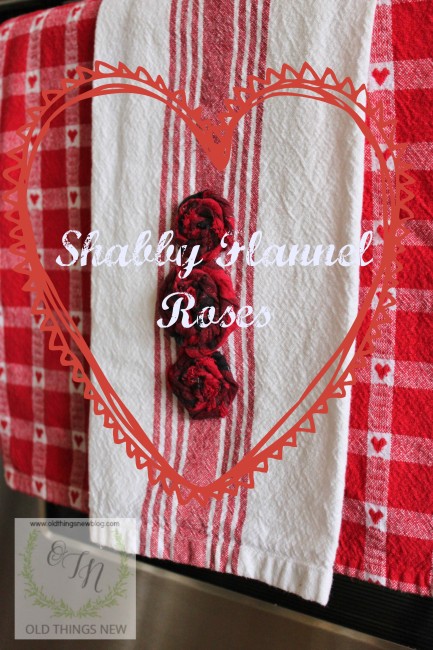
Voila! Shabby flannel roses! Here, I’ve attached them to a kitchen towel to add to my Valentine’s Day decor.

What do you think?

I think there is nothing cuter than rosettes made of flannel.

I think they are good for my health because they make me smile!

I think they add a great pop of color to my white kitchen.

I think they look perfect right alongside my Valentine’s Day towels.

Wool Shirt Rosette Wreath 001-001

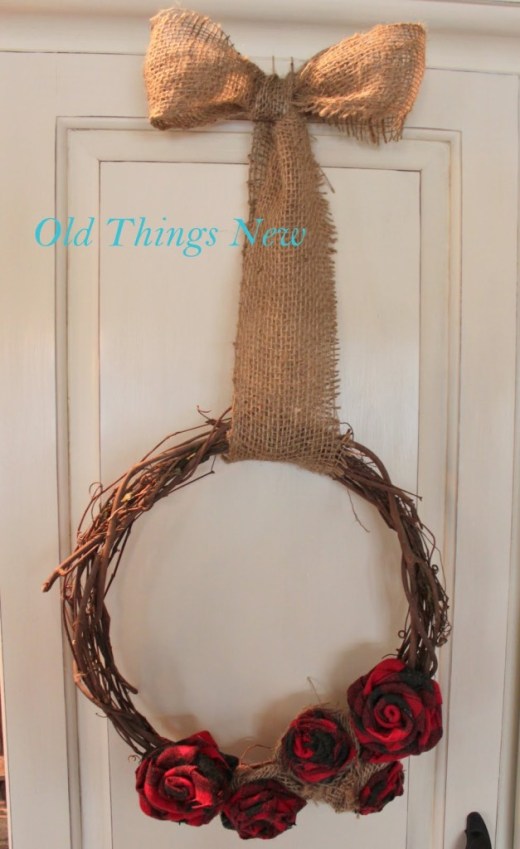
There are so many things you can do with flannel rosettes. I made these rosettes a few years ago for a Christmas wreath but for
Valentine’s Day you could make a heart-shaped wreath, or attach them to a Valentine’s Day card or gift, or put a pin on the back and wear them on the lapel of a jean jacket (cute right?), or make a whole bouquet of plaid roses and pop them into a vase!

Wool Shirt Rosette Wreath 015-001

For the complete instructions for making your own rosettes simply click on the link below:

Rosette Tutorial

Shabby Flannel Roses

I HEART Shabby Flannel Rosettes!

As a reminder, Farragoz’s Art of Patina is giving away a FREE online painting course to one of my lucky readers. For complete details (with pictures) on the course you can link back to my post HERE.

To Enter: Simply follow the directions on the Rafflecopter form below. The more boxes you check the more chances you have of winning! By entering this giveaway you are confirming that you are 18 years or over. Void where prohibited. The contest will run through February 20th and the winner will be announced when all of the numbers are tallied! And . . . please . . . don’t forget to tell your friends about this fantastic giveaway!

This is not a paid post.

Blessings,

a Rafflecopter giveaway

I’ve been known to link up to the following great parties!!!
Sunday:
UnderTheTableAndDreaming, TheDIYShowoff, LifeOnLakeshoreDrive,
ThreeMangoSeeds, NiftyThriftyThings,
SundaySoiree
Monday:
IShouldBeMoppingTheFloor, ModVintageLife, TheDedicatedHouse, UncommonDesigns, WestFurnitureRevival, BoogieboardCottage, HuckleberryLove, CarrieThisHome, Dwellings, AnExtraordinaryDay,
InspireMeMonday, BetweenNapsOnThePorch, RedheadCanDecorate
Tuesday:
HomeStoriesAtoZ, AStrollThruLife, Elizabeth&Co, CoastalCharm, CozyLittleHouse, NaptimeCreations, CedarHillFarmhouse, KatheWithAnE,NotJustAHousewife,
VMG206, TuesdaysAtOurHome,
TwirlAndTakeABow, TheWinthropChronicles, 7Alive, Maison de Pax
Wednesday:
SavvySouthernStyle, IvyAndElephants, DIYByDesign, TheStyleSisters, AdornedFromAbove,
SomedayCrafts, GreenWillowPond, Fishtail Cottage, TheCityFarmhouse,
BeyondThePicketFence, TheBlissfulBee, Posed Perfection
Thursday:
NoMinimalistHere, ImpartingGrace, EmbracingChange, HaveADailyCupOfMrsOlson, AllThingsWithPurpose, MyRepurposedLife, FromMyFrontPorchToYours, ADelightsomeLife, AKAWeekendRetreat,
KatherinesCorner, PrettyPreppyParty
Friday:
FrenchCountryCottage, MissMustardSeed, ThirtyHandmadeDays, CommonGround, TheShabbyNest, LizMarie, Redoux, JenniferRizzo, TheCharmOfHome, RootedInThyme, TheDedicatedHouseAnythingBlueFriday,
DIYVintageChic,
ShabbyliciousFriday
Saturday:
FunkyJunkInteriors, SixSistersStuff, It’sOverflowing, BeDifferentActNormal,
OneMoreTimeEvents, SayG’DaySaturday
Tweet

Filed Under: Crafts, Farragoz, Flowers, leftover fabric, making rosettes, Old Junk Transformations, rosettes, Tutorial, Valentines Day Tagged With: Crafts, DIY, Farragoz, Flowers, Leftover Fabric, Rosettes, Tutorial, Valentine's Day

A Dropcloth Slipcover for an Old Bench

September 28, 2013 by Patti 49 Comments

Here is the AFTER picture of the Dropcloth Slipcover that I recently made for a very outdated old bench. I began this post with an after pic to draw you in . . . mostly because I was afraid that if I showed you the BEFORE pic first you might be scared away!

Here is the BEFORE. I’m ashamed to admit that this shabby (not in the good sense) little bench has been living in my master bedroom. The trim has been a wreck since Sasha was a puppy (ummm . . . 5-1/2 years ago?), the color is no longer to my liking, nor the floral satin fabric. So why have I kept it? It is the little bench that catches stray articles of clothing and mail that needs recycling. It is the bench that hides the electronics charging underneath. It is the bench where my husband sits to slip on his shoes (when there is room to sit). This bench is also a perfect match to my outdated bedroom which I have great plans for making over. Maybe this transformation will be the first step.

So here is how I made a new dropcloth slipcover for my old bench. After disposing of the trim (no, it wasn’t EVEN fit for a future project) I measured the length and width of the old fabric cover and cut my dropcloth fabric to the same size.

I laid my fabric over the bench, lined it up straight, and pinned the corners, pulling the fabric taut.

I sewed along the line of the pins and trimmed close to the seam.

After turning the slipcover right side out and placing it back onto the bench I measured the bottom edge of the fabric along each side. For the ruffles I tore (for a frayed edge) four - 4″ strips of fabric, each one double the length of the side it would be attached to. I sewed a long basting stitch along the long edge of each strip, and pulled the thread to gather to fit each of the four sides, matching the seams in the ruffle to the seams at the four corners of the slipcover. Next, I sewed the four strips together along their short edges and then sewed the whole ruffle to the bottom edge of the slipcover . Why four strips instead of one long strip? First of all, there were going to be a couple of seams somewhere since the doubled circumference of the bottom edge of the slipcover was much longer than my fabric. Secondly, it is tricky to pull gathers in a very long strip and even trickier if the fabric is thick. I didn’t want to risk breaking my thread and losing my gather.

(Sorry, no pictures were taken for this step because everyone knows how to make a ruffle, right?)

After attaching one ruffle I decided I wanted a second one so I repeated the process except with 7″ strips so the bottom ruffle would peek out from beneath the top ruffle.

Just for fun I added a French graphic from The Graphics Fairy website, which I ironed on with transfer paper.

For a final touch I added some handmade dropcloth rosettes around the top of the ruffles. (Rosette tutorial HERE)

I’ve enjoyed using drop cloth fabric for projects around my home. My first experience with this fabric was my Drop Cloth Draperies which have been one of my top viewed projects. I’ve also made pillows, and hand bags (which you can see on my Pinterest “Stuff I Sell” Board. I have a whole list of other great ideas for dropcloths that I want to try in the future. This fabric is great because it is inexpensive, washable (I always pre-wash my fabric), it has the look of linen but it irons up much easier and crisper looking, and it tears nicely leaving a great frayed edge that doesn’t continue to fray.

Once my bench was finished I decided it was just too cute to be used as a catchall in my bedroom any longer and I took her along with me to the French Flea . . .

. . . where she went off to a very good and very stylish new home.

So, have you tried using dropcloth fabric for any projects around your house? What have you made? I’d love to hear about it.

Blessings,

I’ve been known to link up to the following great parties!!!
Sunday:
UnderTheTableAndDreaming, TheDIYShowoff, TheTablescaper, IHeartNapTime, LifeOnLakeshoreDrive, SuburbsMama
Monday:
IShouldBeMoppingTheFloor, ModVintageLife, BetweenNapsOnThePorch, TheGraphicsFairy, TheDedicatedHouse, UncommonDesigns, WestFurnitureRevival, BoogieboardCottage, DIYHomeSweetHome, HuckleberryLove, RainOnATinRoof, AlderberryHill, TwelveOEight,
CarrieThisHome
Tuesday:
HomeStoriesAtoZ, AStrollThruLife, Elizabeth&Co, MyUncommonSliceOfSuburbia, CoastalCharm, CozyLittleHouse, NaptimeCreations, CedarHillRanch, BloomingHomestead,KatheWithAnE,NotJustAHousewife,
VMG206, BeBetsy,TuesdaysAtOurHome, ADiamondInTheStuff, WeCallItJunkin’
Wednesday:
SavvySouthernStyle, The36thAvenue, SouthernLovely, VintageOnADime, IvyAndElephants, DIYByDesign, TheStyleSisters, AdornedFromAbove, Timewashed, SomedayCrafts, GreenWillowPond, Fishtail Cottage
Thursday:
NoMinimalistHere, ImpartingGrace, TheSabbyCreekCottage, EmbracingChange, HaveADailyCupOfMrsOlson, BeyondThePicketFence, StoneGable, AllThingsWithPurpose, MyRepurposedLife, FromMyFrontPorchToYours, ADelightsomeLife
Friday:
MyRomanticHome, FrenchCountryCottage, TatertotsAndJello, MissMustardSeed, ThirtyHandmadeDays, CraftJunkieToo, CommonGround, TheShabbyNest, LizMarie, Redoux, JenniferRizzo, TheCharmOfHome, RootedInThyme, 504Main, TheDedicatedHouseAnythingBlueFriday,
CraftFrenzyFriday
Saturday:
FunkyJunkInteriors, ClassyClutter, SixSistersStuff, It’sOverflowing, BeDifferentActNormal, TooMuchTimeOnMyHands,
OneSharendipityPlace


Tweet

Filed Under: Annie Sloan, ASCP, chalk paint, DIY, Drop Cloth Projects, French flea market, Home decorating, Junking, leftover fabric, making rosettes, Old Junk Transformations, rosettes, Thrifting, Tutorial, Uncategorized, uses for leftover fabric Tagged With: Drop cloth projects, French Flea Market, Home Decor, old junk transformations, thrifting, Tutorial

Magnetic Board Tutorial

August 5, 2013 by Patti 13 Comments

My life is a whirlwind! We have lots of company coming and going this month (fun times), we are beginning to gear up for the class we teach starting in the Fall (Freedom Session) and I’m trying to get ready for the Queen Bee French Flea in September. My posts will likely be a bit sparse over the next weeks and mostly about the things I’m making for the flea market.
I shared in my last post a picture of a magnetic board that I have hanging on my Message Center Wall, and I promised I’d share a tutorial so . . . here you have it!
I started with an old frame,
added a couple coats of spray paint,
took an inside measurement of the frame,
and, with some really good metal cutting tools, . . .
. . . I began carefully cutting the piece of sheet metal that I purchased at my local hardware store. Notice that I marked my cutting lines with permanent marker. It is really important to get this the right size the first time because it is a little hard (and time consuming) to cut through a large piece of sheet metal. I really didn’t want to have to go back and do any more trimming.
Whew! Perfect fit. Someone IS definitely watching out for me!
To hold the sheet metal in place I added a few small nails around the perimeter of the frame.
Here you have the finished product!
Since this is for a French Flea I printed off a picture of a fleur de lis (from The Graphics Fairy of course), cut it out, making a stencil of the piece of paper I printed it on, taped it down well with two-sided tape, and spray painted it onto the sheet metal. IMPORTANT: Paint doesn’t adhere to sheet metal well as it has a protective oil coating. I prepared the surface by washing it well with white vinegar.
I draped the frame with some vintage handmade Irish lace from my mother-in-law. Doesn’t this lace look sort of like a banner?

I added some rosette magnets for fun. These are made with old lace, burlap and drop cloth fabric (rosette tutorial HERE).

And here she is . . . ready for market.
Thanks for stopping by for a little market preview!
Blessings,
I’ve been known to link up to the following great parties!!!

Sunday:

UnderTheTableAndDreaming, TheDIYShowoff, TheTablescaper, IHeartNapTime, LifeOnLakeshoreDrive, SuburbsMama
Monday:
IShouldBeMoppingTheFloor, ModVintageLife, BetweenNapsOnThePorch, TheGraphicsFairy, TheDedicatedHouse, UncommonDesigns, WestFurnitureRevival, BoogieboardCottage, DIYHomeSweetHome,HuckleberryLove, RainOnATinRoof, AlderberryHill, TwelveOEight,
CarrieThisHome
Tuesday:
HomeStoriesAtoZ, AStrollThruLife, Elizabeth&Co, MyUncommonSliceOfSuburbia, CoastalCharm, CozyLittleHouse, NaptimeCreations, CedarHillRanch, BloomingHomestead,KatheWithAnE,NotJustAHousewife,
VMG206, Hickory Trail, BeBetsy,TuesdaysAtOurHome, ADiamondInTheStuff
Wednesday:
SavvySouthernStyle, The36thAvenue, SouthernLovely, VintageOnADime, IvyAndElephants, DIYByDesign, TheStyleSisters, AdornedFromAbove, Timewashed, SomedayCrafts, GreenWillowPond, FishtailCottage
Thursday:
NoMinimalistHere, ImpartingGrace, TheSabbyCreekCottage, EmbracingChange, HaveADailyCupOfMrsOlson, BeyondThePicketFence, StoneGable, AllThingsWithPurpose, MyRepurposedLife, FromMyFrontPorchToYours, ADelightsomeLife
Friday:
MyRomanticHome, FrenchCountryCottage, TatertotsAndJello, MissMustardSeed, ThirtyHandmadeDays, CraftJunkieToo, CommonGround, TheShabbyNest, LizMarie, Redoux, JenniferRizzo, TheCharmOfHome, RootedInThyme, 504Main, TheDedicatedHouseAnythingBlueFriday
Saturday:
FunkyJunkInteriors, ClassyClutter, SixSistersStuff, It’sOverflowing, BeDifferentActNormal, TooMuchTimeOnMyHands,
OneSharendipityPlace

© copyright 2012 – All rights reserved

Your Blog

Tweet

Filed Under: Burlap Rosettes, Craft Ideas, DIY, Drop Cloth Projects, French flea market, Home decorating, leftover fabric, making rosettes, Old Junk Transformations, rosettes, Thrift Store Re-purposing, Tutorial, vintage lace

Braided Cuff Tutorial

April 7, 2013 by Patti 46 Comments

Today I’m sharing my braided cuff made from an old T-Shirt. This was quick, easy and inexpensive, (all things that make me smile) and I can’t tell you how many people have complimented me on this little bracelet.
Before I get to the tutorial . . . I did a post awhile back on an “accidental” necklace that I made while trying to create an infinity scarf from an old T. Here is a picture of that completed project (I love it when accidents turn into something better than the original plan don’t you?).
A link back to that tutorial can be found by clicking HERE
Even though that project had a good end result I still wanted to try making the infinity scarf. As my mom always told me, “If at first you don’t succeed try, try again.”
So . . . tada! Below is my second attempt at an infinity scarf and this time I was successful. I don’t know if I’d really call it a scarf, it is sort of a scarf/necklace, but whatever it is I kinda like it.
This is the lovely T-Shirt I used (don’t worry Mr. OTN, it isn’t one of yours). Love the color . . . but what was I to do with the leftover fabric?If I could use it for something I was determined to do so.
I made a decision to make a bracelet and began by cutting nine 1″ wide strips of fabric from the sleeves.
I gave them all a good stretch to make them curl in on themselves.
Then I knotted three strands together on one end and began braiding. Everyone knows how to braid, right?
When I’d made three braided strands I simply stitched them together on my sewing machine.
I adjusted the bracelet to fit my wrist, trimmed off the excess fabric, machine stitched across the ends of the braids so they wouldn’t come unraveled and then hand stitched the ends together to make the circle that is the bracelet. This is how it looked at that point. Cute enough but not quite finished!
A quick trip over to the kitchen garbage can to dig out the hem of the cuff that I’d already thrown away (it was only a little bit damp) and . . .
. . . well, you know how I love rosettes! So here we go again with the making of a little rosette adornment. You can find a tutorial for this type of rosette HERE, the only difference being that I made more twists in the fabric to give it a flatter appearance.
I stitched the rosette to the top of the bracelet and added one final embellishment . . . a button from my stash of miscellaneous pretties.
So there you have it! The one thing I might do differently the next time is to use store purchased snaps as a closure. With the weight of the rosette on top my bracelet tends to turn sideways, unless I put it on over the sleeve of whatever shirt I’m wearing.
Can you even believe that that old Columbus fist bumping T-Shirt could be transformed into something I’d actually be happy to wear?
I am having the time of my life making OldThingsNew!
Blessings,
Linking up to the following great parties:
Sunday:
UnderTheTableAndDreaming, TheDIYShowoff, TheTablescaper, IHeartNapTime, My1929Charmer, LifeOnLakeshoreDrive, USSCrafty
Monday:
KatheWithAnE, IShouldBeMoppingTheFloor, ModVintageLife, BetweenNapsOnThePorch, TheGraphicsFairy, TheDedicatedHouse, UncommonDesigns, WestFurnitureRevival, NotJustAHousewife, BoogieboardCottage, DIYHomeSweetHome
Tuesday:
HomeStoriesAtoZ, AStrollThruLife, Elizabeth&Co, MyUncommonSliceOfSuburbia, CoastalCharm, CozyLittleHouse, PJHDesigns, NaptimeCreations, CedarHillRanch, DesignDecorTuesday, BloomingHomestead, FlusterBuster
Wednesday:
SavvySouthernStyle, The36thAvenue, SouthernLovely, VintageOnADime, IvyAndElephants, FromMyFrontPorchToYours, DIYByDesign, DesignedDecor, ViewFromRiverMountain, TheStyleSisters, AdornedFromAbove, Timewashed, SomedayCrafts, SewCraftyAngel
Thursday:
NoMinimalistHere, ImpartingGrace, TheVintageFarmhouse, TheSabbyCreekCottage, EmbracingChange, HaveADailyCupOfMrsOlson, BeyondThePicketFence, StoneGable, AllThingsWithPurpose, MyRepurposedLife
CraftsALaMode
Friday:
MyRomanticHome, FrenchCountryCottage, TatertotsAndJello, MissMustardSeed, ThriftyHandmadeDays, CraftJunkieToo, CommonGround, TheShabbyNest, LizMarie, Redoux, JenniferRizzo, TheCharmOfHome, RootedInThyme, 504Main
Saturday:
FunkyJunkInteriors, ClassyClutter, SixSistersStuff, It’sOverflowing, BeDifferentActNormal, TooMuchTimeOnMyHands

© copyright 2012 – All rights reserved

Your Blog

Tweet

Filed Under: Craft Ideas, Jewelry, Junking, Knitting, Old T-Shirt Bracelet, rosettes, Thrift Store Re-purposing, vintage buttons

  • 1
  • 2
  • Next Page »
OldThingsNew

I am Perfectly Imperfect Patti, daughter of the King, wife to the amazing Mr. OTN, mom to two grown daughters, a great son-in-law, and companion to two spoiled dogs. At Old Things New I share DIY’s, budget friendly home transformations, as well as posts about how God transforms our souls. I myself have been made new and I love to share what I’ve learned through WRITING and SPEAKING. To view a short Vimeo of “Our Story” (Mr. OTN and I) please follow the link at the top of the page.

Disclosure: Old Things New is a participant in the Amazon affiliate advertising program, which is designed to provide a means for sites to earn advertising fees by advertising and linking to Amazon.com . . . or, in other words, Shopping through my links helps Old Things New keep the lights on!

Search this site

Click below to:

Follow on Bloglovin

Click on icon below to follow me on Facebook, Twitter, Pinterest, & Instagram

facebook twitter pinterest instagram

My HGTV Tiny House Hunter Experience

My HGTV Tiny House Hunter Experience

Christmas Cloche Ideas

Christmas Cloche Ideas

Pottery Barn Knockoff Jingle Pillow

Pottery Barn Knockoff Jingle Pillow

Christmas Shopping Ideas

Farragoz Online Painting Course

Save

Instagram

This error message is only visible to WordPress admins
Error: No posts found.

See what I’ve been pinning lately!

Color Washing Technique

Color Washing Technique

Chalk Painted Kitchen Cabinet Tutorial

Chalk Painted Kitchen Cabinet Tutorial

Three Chalk Paint Recipes Reviewed

Three Chalk Paint Recipes Reviewed

Fab Over 50 (or 60, or 70 . . .)

Fab Over 50 (or 60, or 70 . . .)

Love Fashion? Follow my Fab Over 50 Board on Pinterest!

Archives

  • December 2018 (2)
  • October 2018 (31)
  • September 2018 (2)
  • August 2018 (3)
  • March 2018 (1)
  • December 2017 (4)
  • November 2017 (3)
  • October 2017 (3)
  • September 2017 (4)
  • August 2017 (9)
  • July 2017 (7)
  • June 2017 (8)
  • May 2017 (9)
  • April 2017 (7)
  • March 2017 (1)
  • February 2017 (5)
  • January 2017 (5)
  • December 2016 (1)
  • November 2016 (1)
  • October 2016 (1)
  • September 2016 (3)
  • August 2016 (7)
  • July 2016 (3)
  • June 2016 (4)
  • May 2016 (5)
  • April 2016 (6)
  • March 2016 (7)
  • February 2016 (6)
  • January 2016 (9)
  • December 2015 (12)
  • November 2015 (11)
  • October 2015 (7)
  • September 2015 (3)
  • August 2015 (3)
  • July 2015 (8)
  • June 2015 (6)
  • May 2015 (1)
  • April 2015 (8)
  • March 2015 (10)
  • February 2015 (8)
  • January 2015 (7)
  • December 2014 (9)
  • November 2014 (7)
  • October 2014 (7)
  • September 2014 (3)
  • August 2014 (2)
  • July 2014 (5)
  • June 2014 (5)
  • May 2014 (4)
  • April 2014 (12)
  • March 2014 (7)
  • February 2014 (1)
  • January 2014 (3)
  • December 2013 (7)
  • November 2013 (4)
  • October 2013 (6)
  • September 2013 (6)
  • August 2013 (6)
  • July 2013 (7)
  • June 2013 (11)
  • May 2013 (8)
  • April 2013 (7)
  • March 2013 (9)
  • February 2013 (10)
  • January 2013 (6)
  • December 2012 (5)
  • November 2012 (2)
  • October 2012 (2)
  • September 2012 (2)
  • August 2012 (5)
  • July 2012 (6)
  • June 2012 (3)

Tags

Addiction Antiques and Collectibles Blogging Books Chalk Paint Chalk Painted Furniture Christianity Christmas Coastal Style Crafts DIY Drop cloth projects Entertaining Faith Fall Decor Flowers Food Freedom Freedom Friday Freedom Session French Country Friendship Furniture Painting Gardening God's grace Home Decor Home Decorating Hospitality Inspiration Junking Lakeside living Marriage My Home My Story old junk transformations Prayer Recipes Recovery Redemption Shopping southern living Spring Tablescapes thrifting Tutorial

Fistbump Media, LLC

Copyright © 2021 · All Rights Reserved · Designed by Blogger Boutique for Old Things New Blog


Loading Comments...